Smarter Shopping, Better Living!

Home>GMC>TRONXY 3D Printer XY-2 Pro-2E 255*255*245mm I3 FDM-Dual Color 3D Printer 2-IN-1-OUT 3D Printer DIY Kit


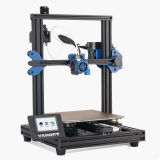


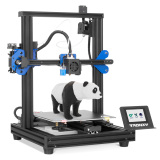
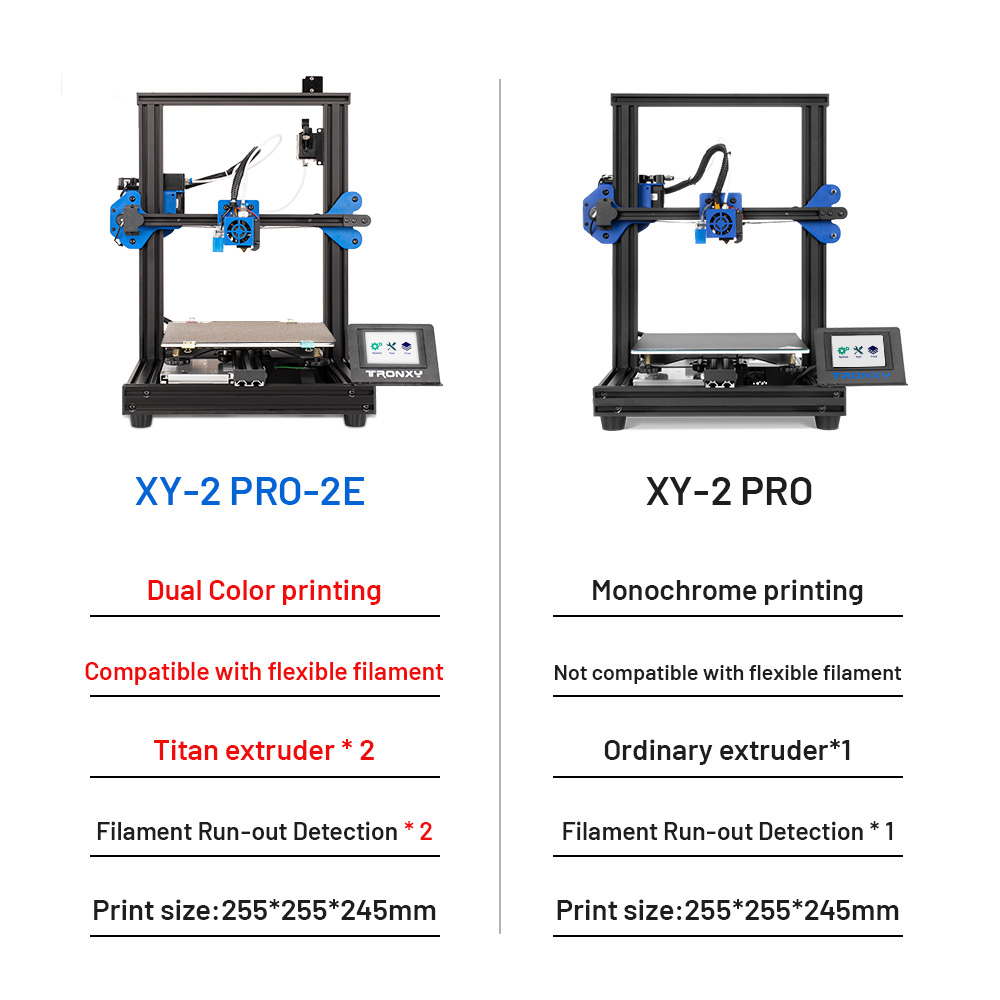
TRONXY 3D Printer XY-2 Pro-2E 255*255*245mm I3 FDM-Dual Color 3D Printer 2-IN-1-OUT 3D Printer DIY Kit Item NO.: XY-2 PRO-2E
Copy and share this link on social network or send it to your friends
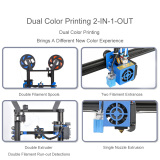
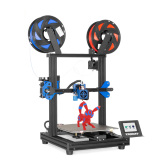
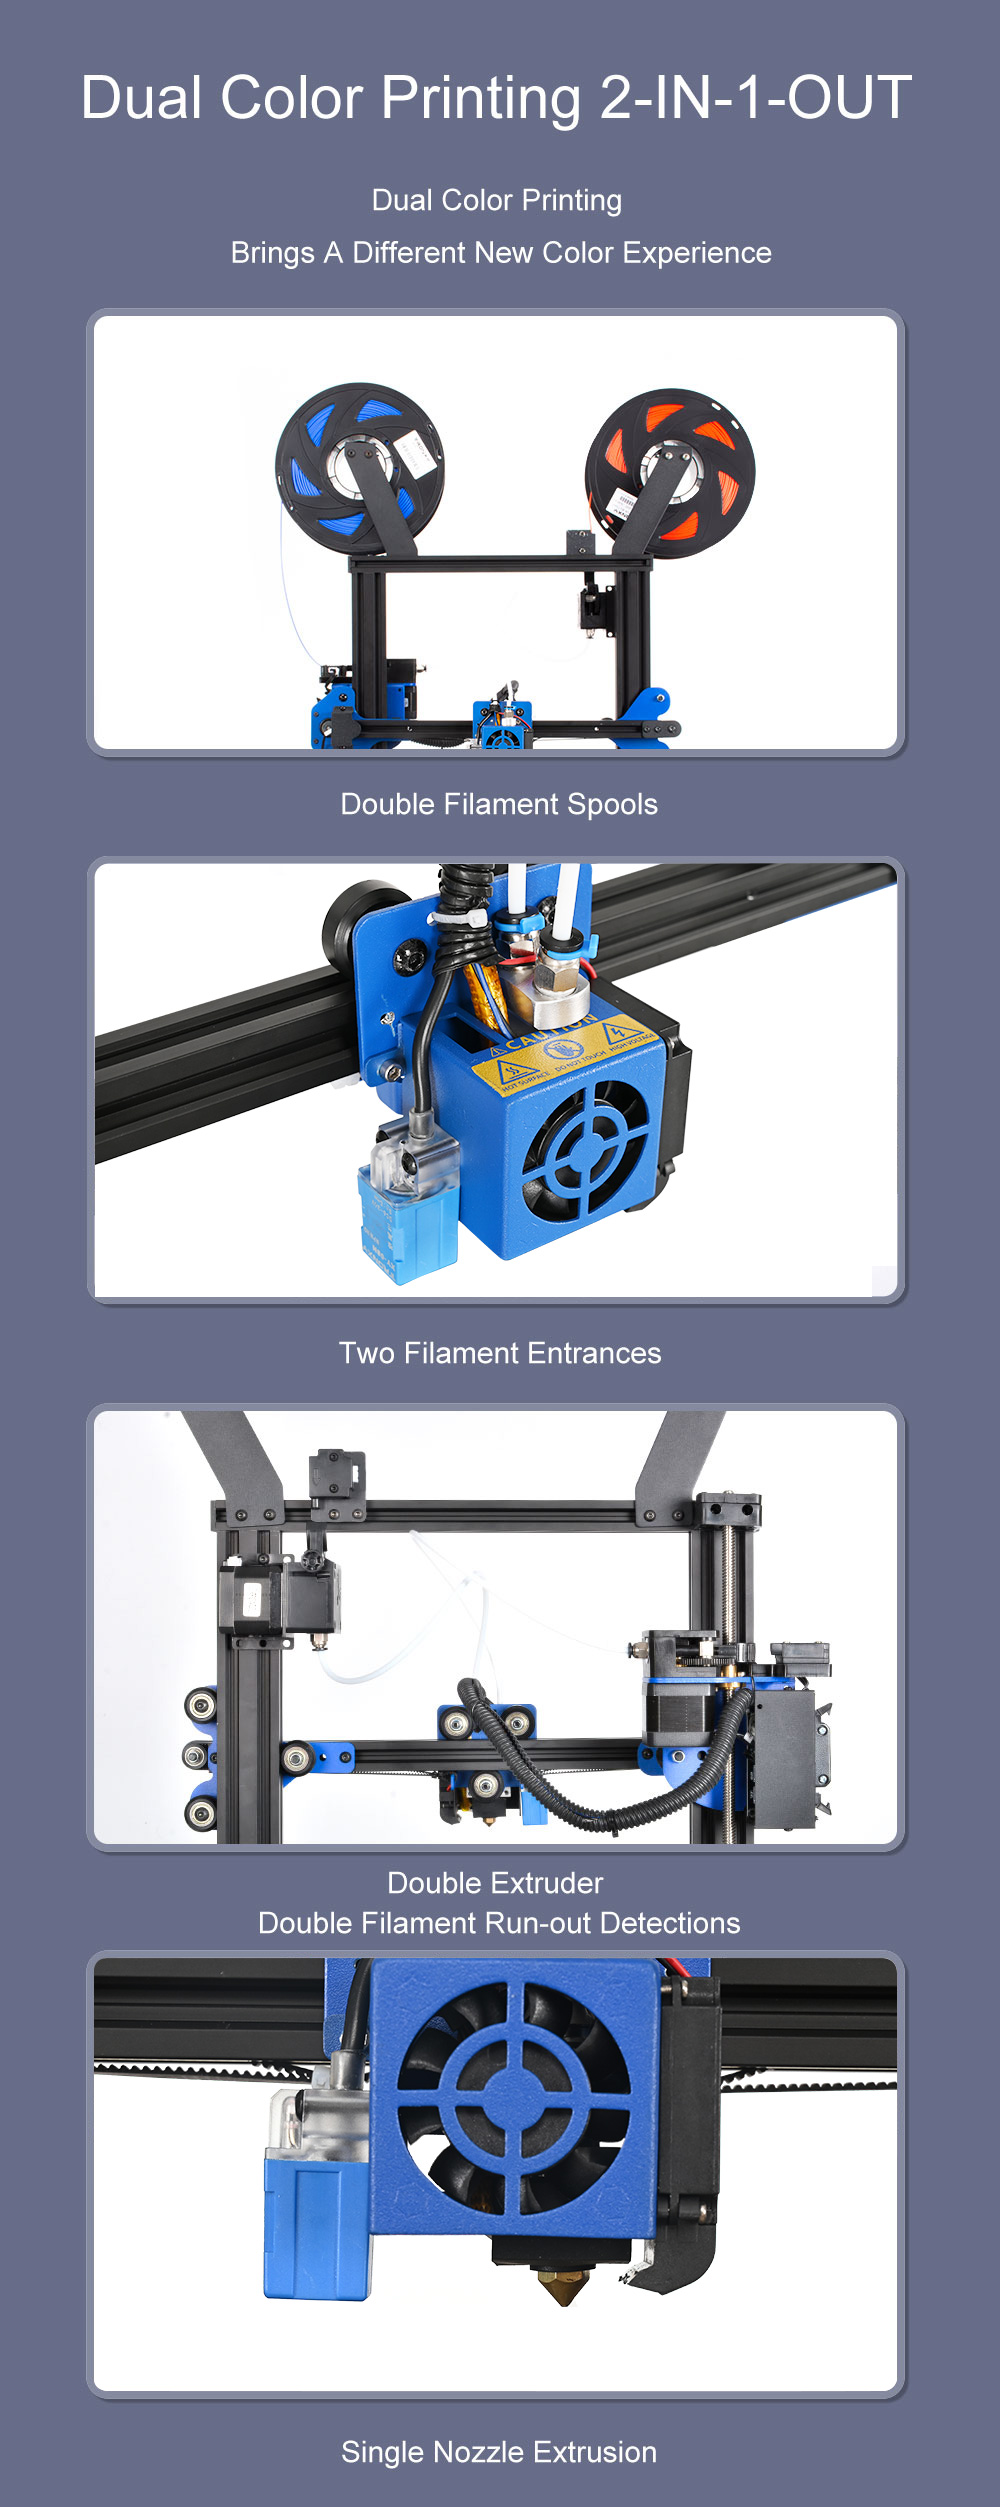
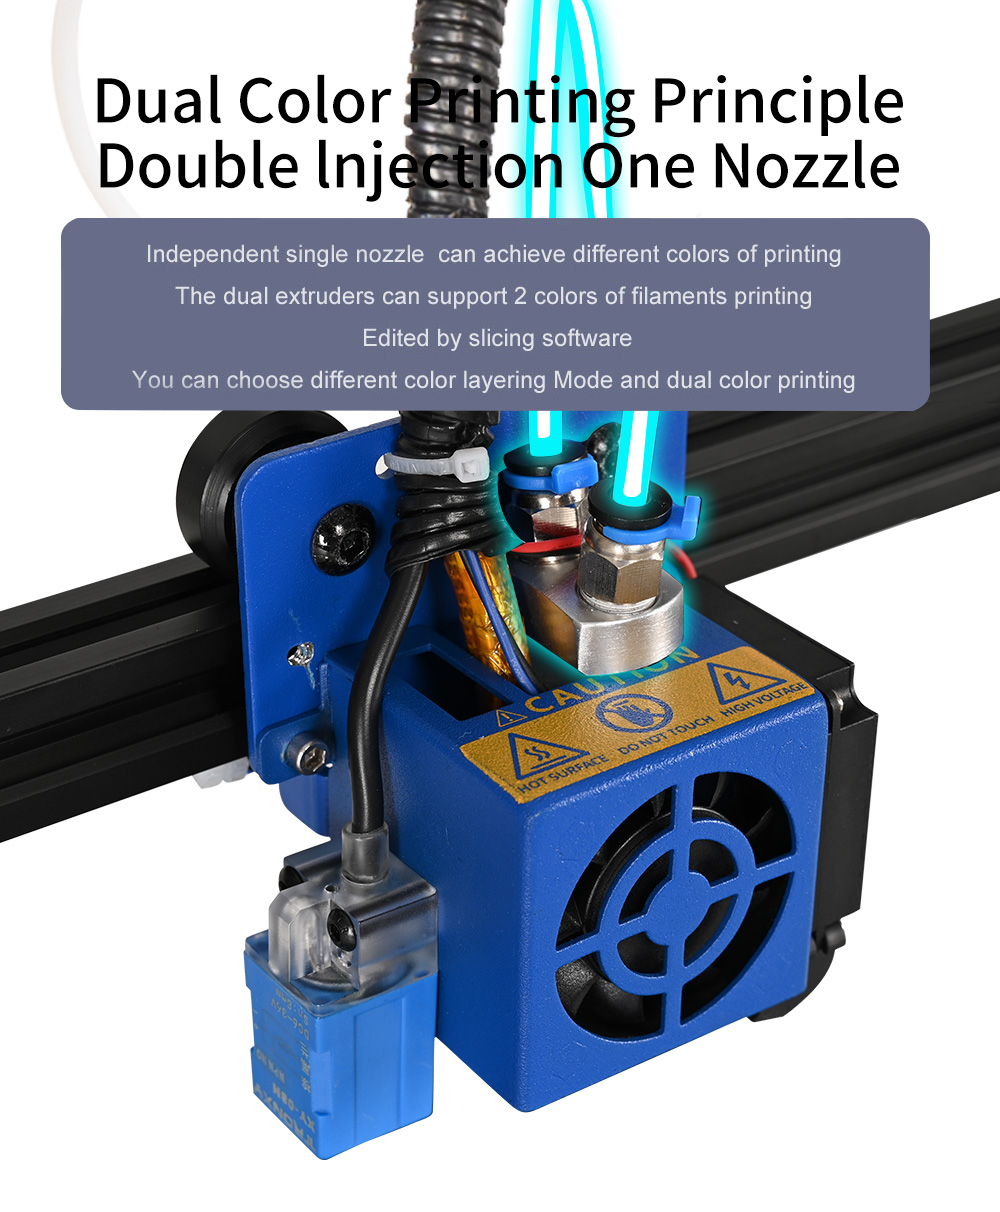
Copy- 【2-In-1-Out】
- 【Two Filament Entrances】
- 【Fast assembly】
- 【Rapid heating】
- 【Aluminum frame】
- 【3.5 inch touch screen】
- 【Single cable design】
- 【Wearble pulley】
- 【Double fans extruder head】
- 【Auto leveling】
- 【Adjustment nuts】,
- 【Filament run-out detection】
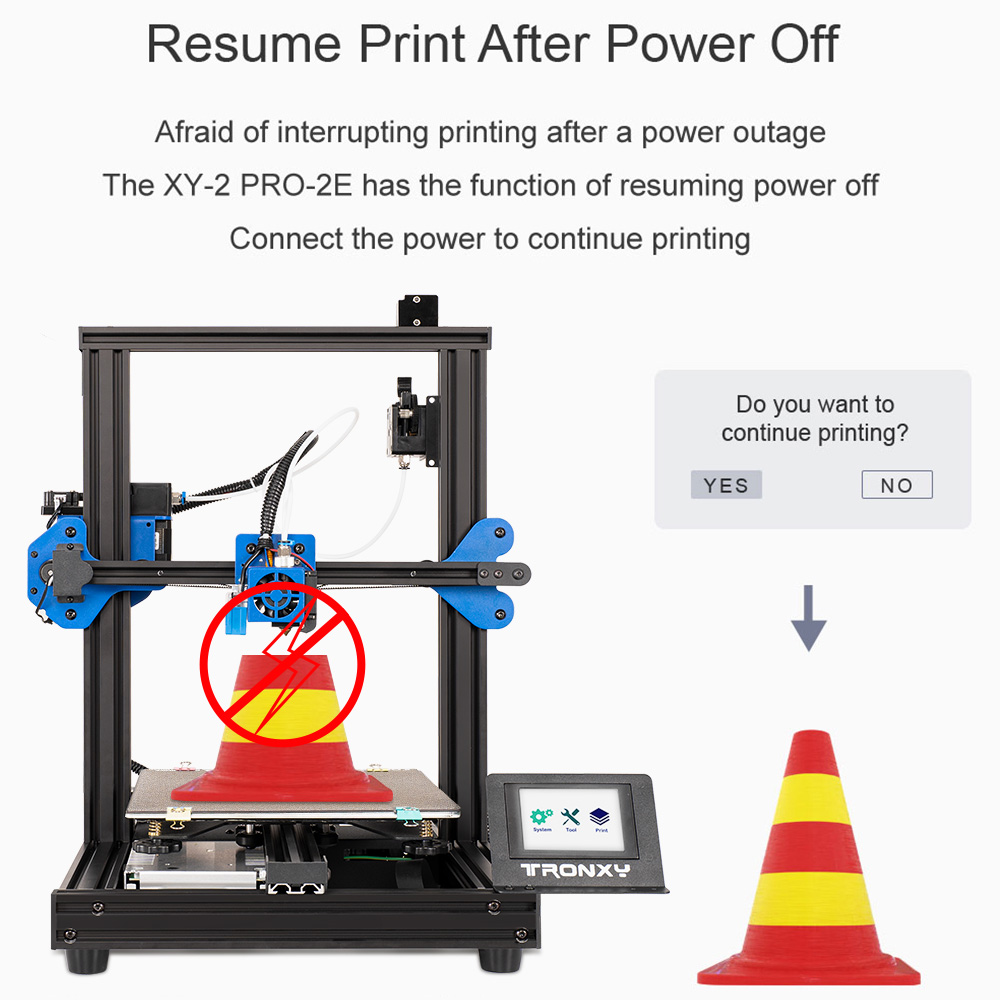
- 【Resume print after power-off】,
- 【It is a DIY assembly machine. It is more suitable for some enthusiasts with 3D printing experience to buy. Of course, if you are a DIY enthusiast or a beginner who is willing to spend a lot of time to assemble and learn 3D printing, you can also choose to buy】
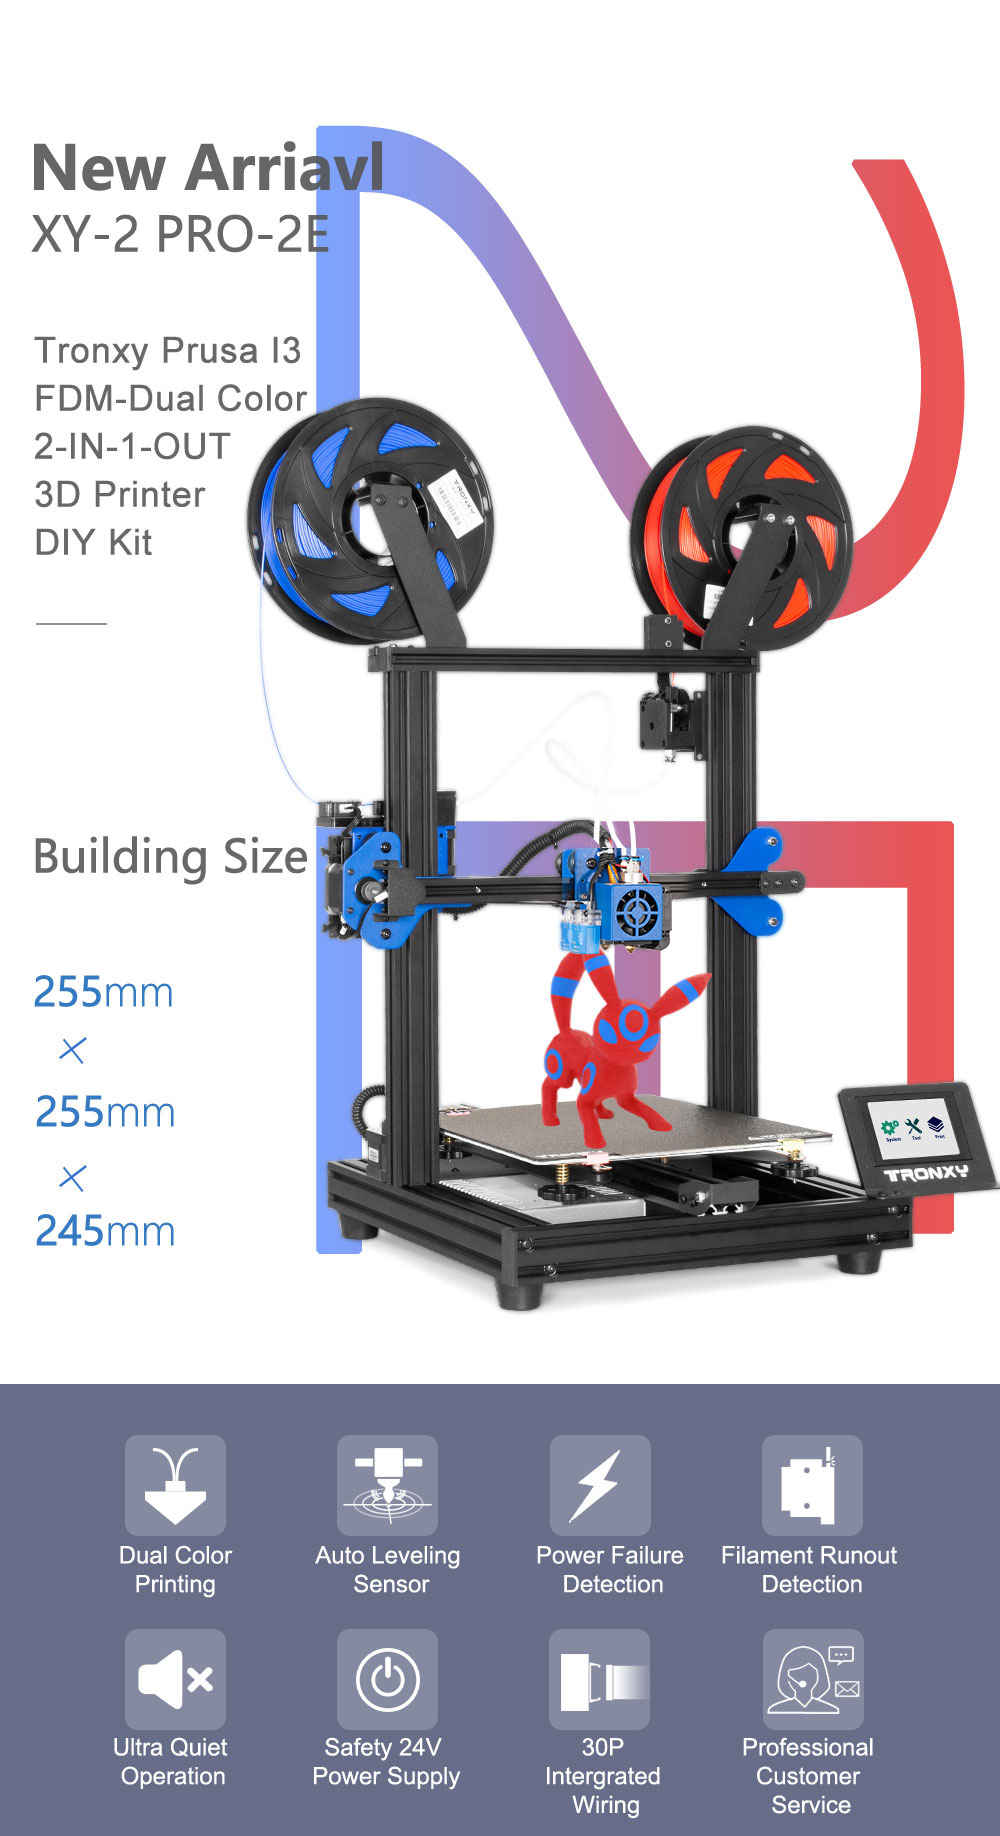
| Product Name | TRONXY 3D Printer XY-2 Pro-2E 255*255*245mm I3 FDM-Dual Color 3D Printer 2-IN-1-OUT 3D Printer DIY Kit |
| Item NO. | XY-2 PRO-2E |
| Weight | 13 kg = 28.6601 lb = 458.5615 oz |
| Category | GMC |
| Tag | TRONXY XY-2 PRO , TRONXY XY-2 PRO TITAN , XY-2 PRO 2E , DUAL EXTRUSION , DUAL COLOR 3D PRINTER , 2E Series |
| Brand | Tronxy |
| Creation Time | 2021-02-25 |
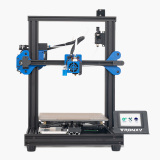
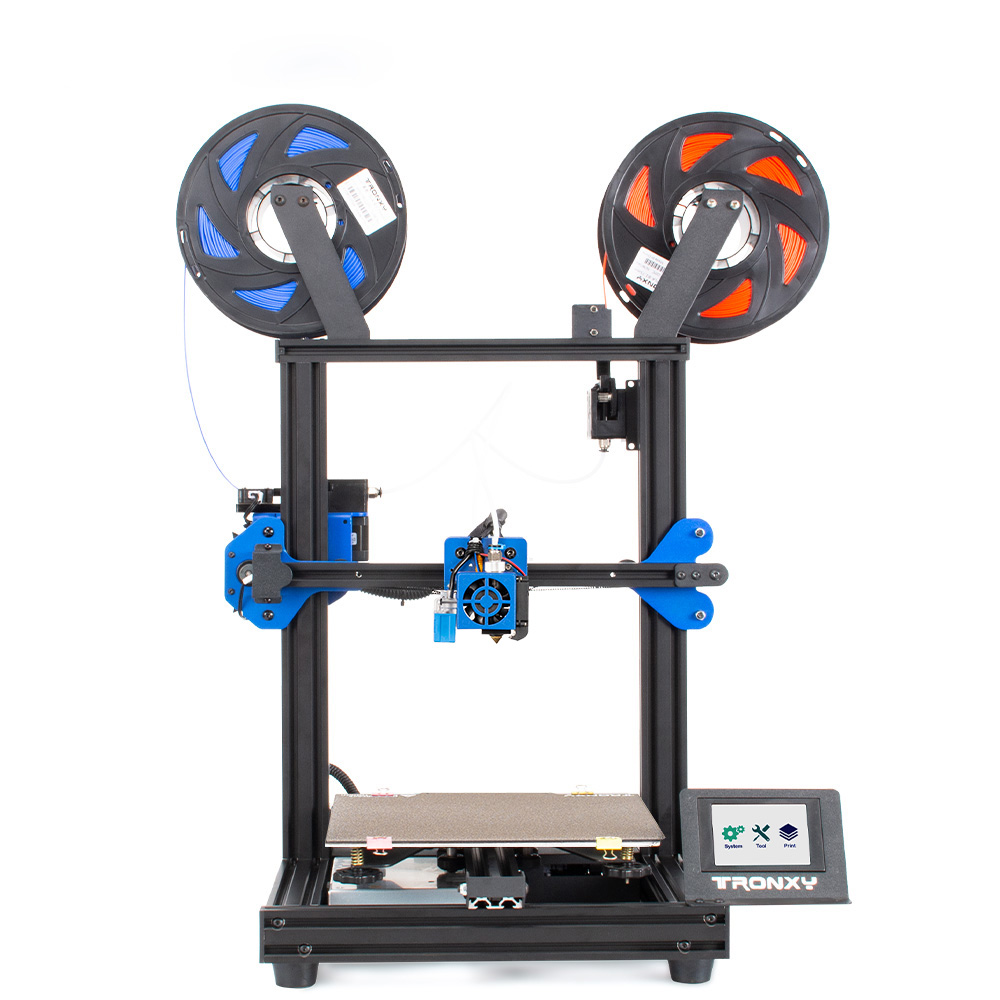
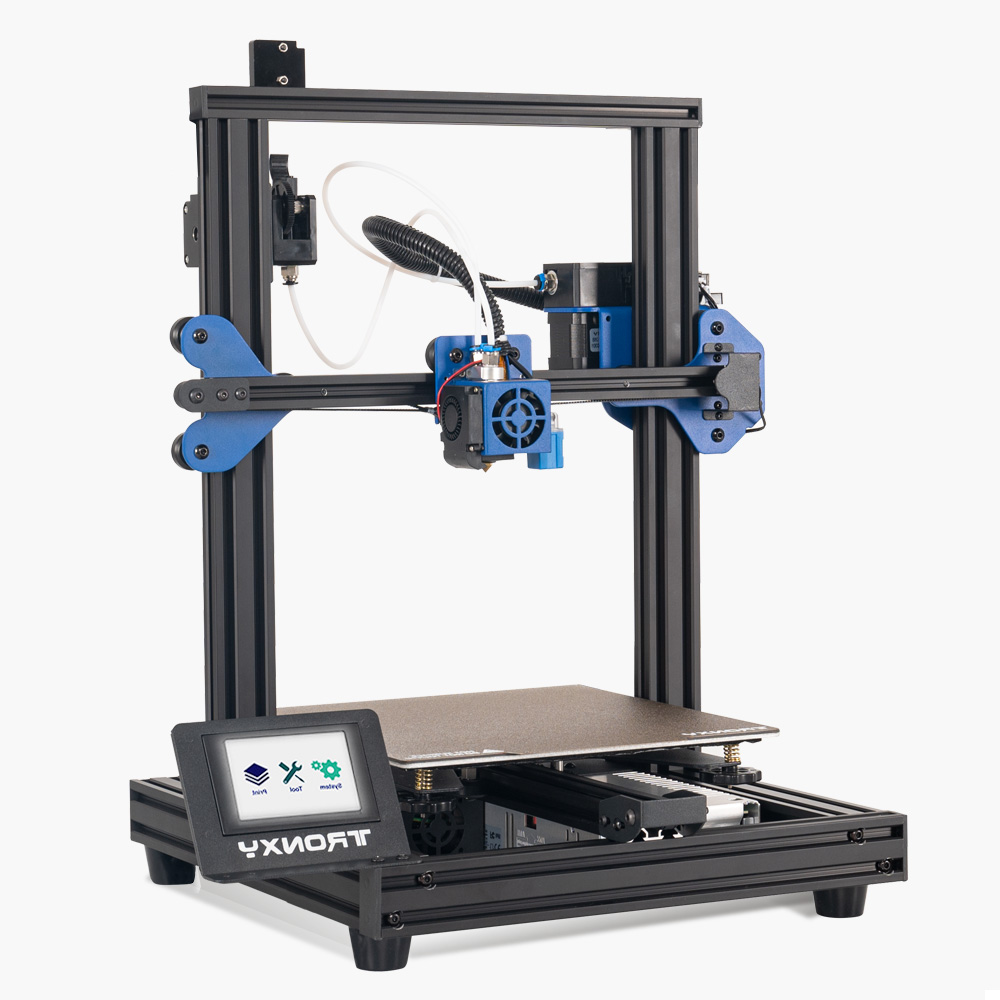
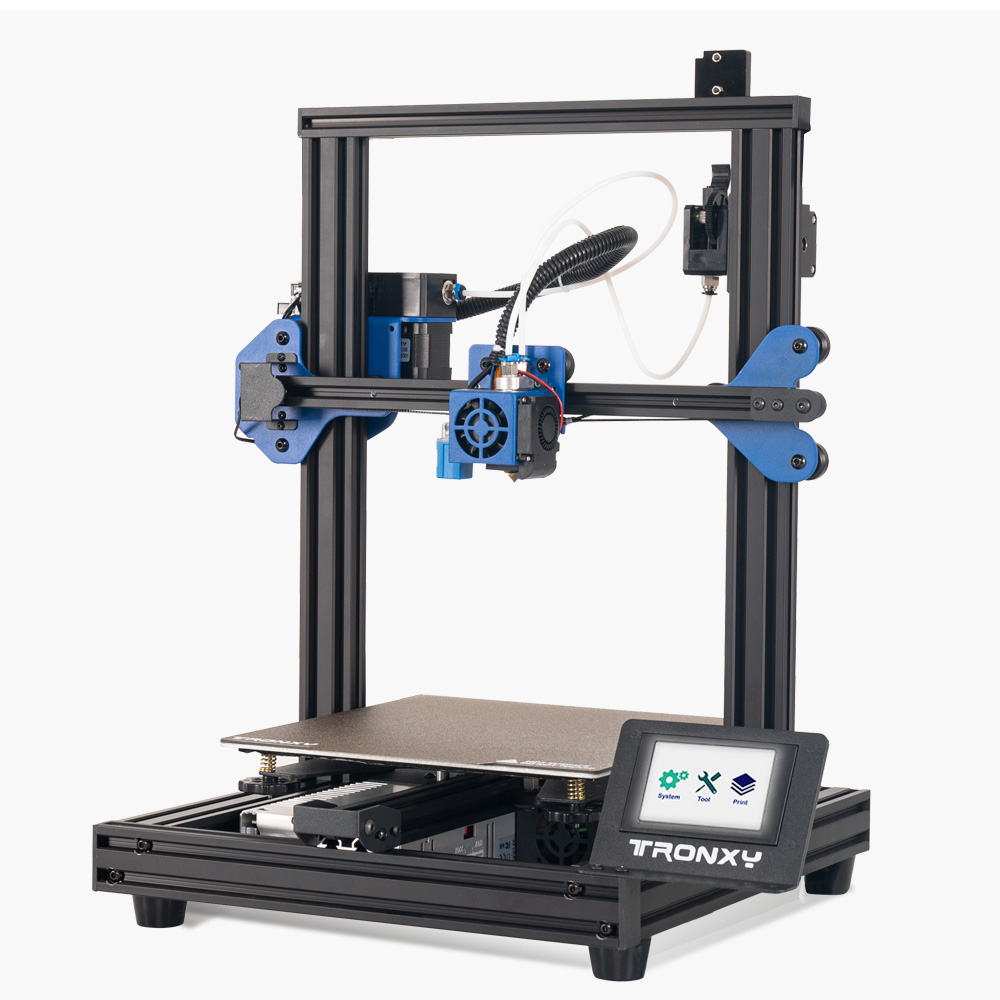
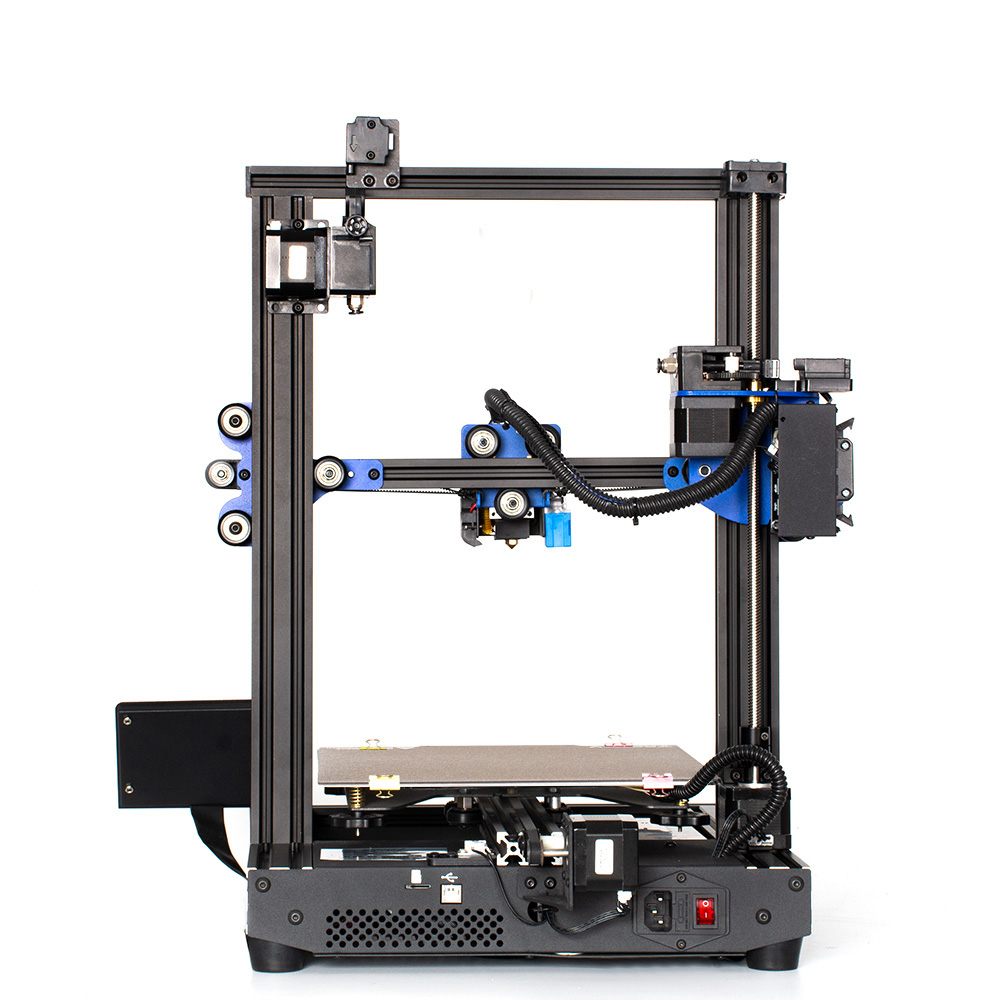
Tronxy Prusa I3 FDM-Dual Color 3D Printer 2-IN-1-OUT 3D Printer DIY Kit XY-2 PRO-2E
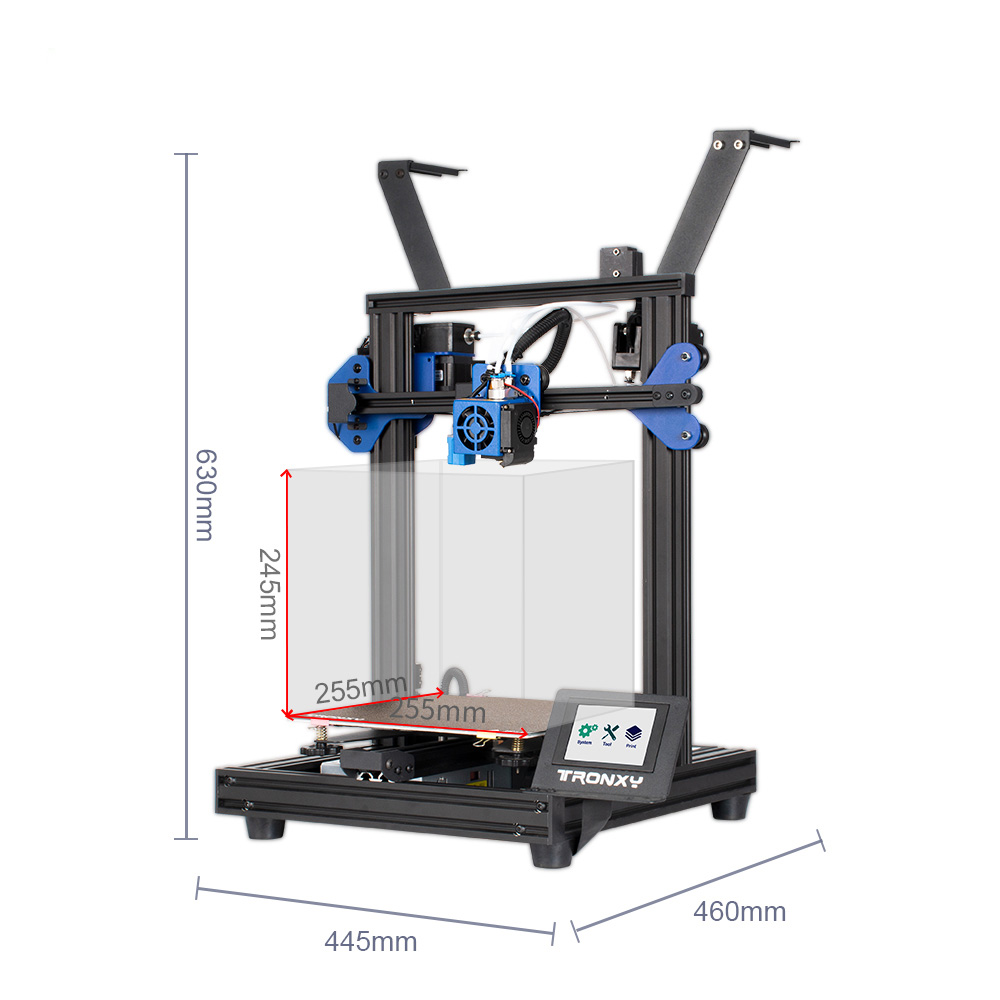
Fast Assembly Quick Installation Auto Leveling Continuation Print Power Filament Sensor Full Color Touch Screen 255mmX255mmX245mm


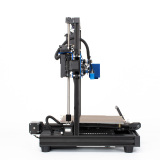
Prusa I3 tronxy xy-2 pro 2e FDM 3d printer Friendly Reminder
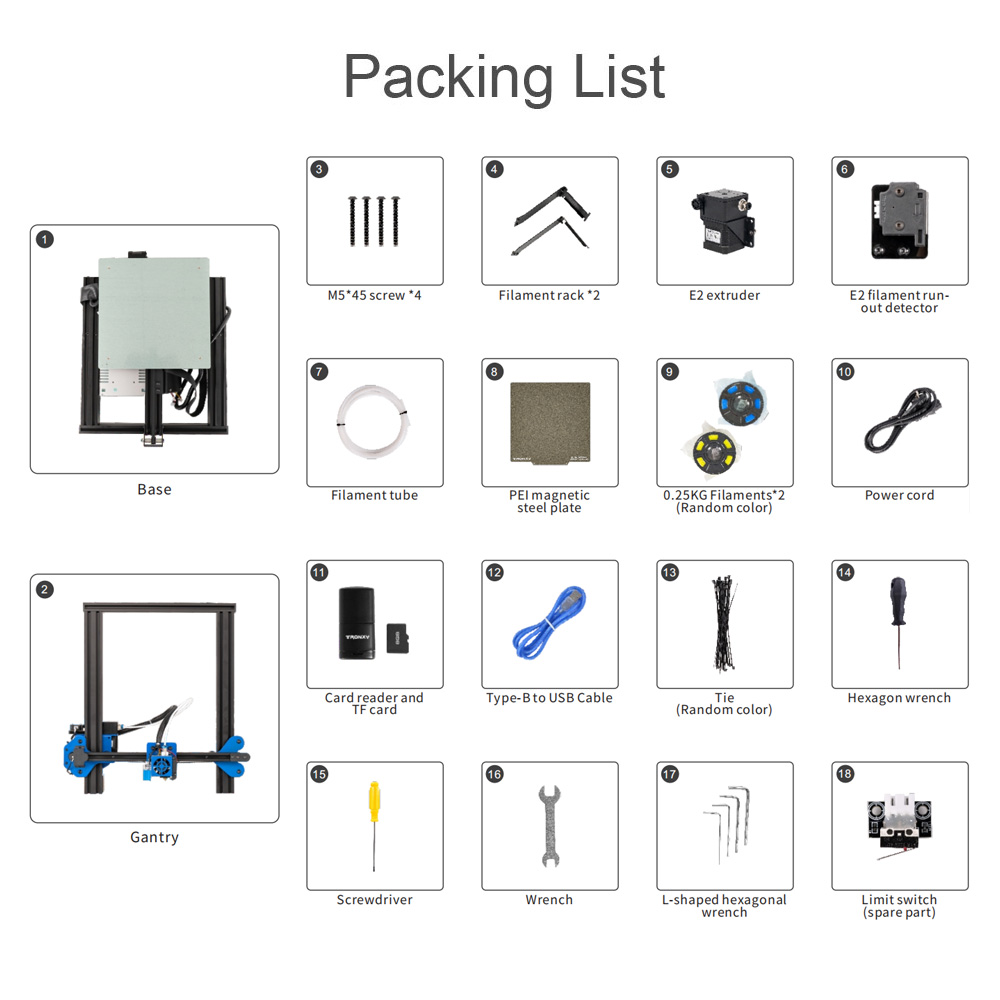
- 1.When receiving your printer, kinldy please check the parts in the package according to the manual packing list. If you have any questions, you can message to us online. At the same time, you may need to tighten the screws of printer, which may loosen during long-distance transportation. Thanks for choosing TRONXY!!!
- 2.The setup for this printer is quick and easy, just three steps:
- (1) Connect the display
- (2) Connect the gantry to the base, fixed with four screws
- (3) Install the Filament bracket
- 3.Complete install, leveling the bed and set Z offset according manual, then you can begin to start your first printing.
- 4.Since stickers and filaments are gifts, if they are damaged during use, reissuance and replacement are not provided, thank you for your understanding
- 5. Set Z offset is important step, don't miss it !

You May Also Like
-

-
")
-

-

-
 TRONXY X5SA-500-2E 3D Printer 500*500*600mmUS$ 917.70 US$ 1380.00
 -
 TRONXY X5SA-400-2E 3D Printer 400*400*400mmUS$ 484.38 US$ 828.00
 -
 Tronxy 2 in 1 out Extrusion Head for 2EUS$ 23.58 US$ 34.67
 -
") 3D Flexible Yellow TPU Filament 1.75 mm, 2.2 LB...US$ 33.01 US$ 36.00
3D Flexible Yellow TPU Filament 1.75 mm, 2.2 LB...US$ 33.01 US$ 36.00
Newsletter
- Company Info
- About Us
- Contact Us
- News Center
- Support Center
- User Center
- Register
- My Account
- My Orders
- Tracking Order
- Forget Password
Copyright © 2012-2023 Tronxy 3D Printer All Rights Reserved.
No related record found